Myko Help & Advice
Frequently asked questions & product help. Can we help you with a question?
Frequently asked questions & product help. Can we help you with a question?
Categories:
The Myko app is free and downloadable from the Apple App Store and the Google Play Store. Just search for “Myko.”
The Myko app currently runs on:
Supported versions of the mobile operating systems (OS) will change over time as new versions are released by Apple and Google. Users should keep their mobile devices up to date with the latest available OS version.
Customer Services - The Myko app may also work with older versions of iOS and Android OS, but this is not guaranteed.
The Myko app requires that you have Bluetooth turned on, asks that you have enabled and allowed access to Location services, and requires access to the Camera, Bluetooth (“Nearby Devices” in Android) access is required for adding Myko products to your account and then controlling them when Wi-Fi is not available. Users do not need to pair their Myko products with Bluetooth explicitly; that will happen automatically in the background.
Location access permission is first requested when onboarding a product, as it is required for some specific products, such as when usingSunrise/Sunset in Scheduling. Access is not required to operate Myko products in general. Also, information provided when you allow Location service access can be helpful for support and diagnostic services. For more information, please refer to the Myko privacy policy.
Note: For Android mobile phones, please select "Precise" mode when turning on location services. This mode enables GPS.
Camera access is required to scan QR Codes when you add products to your Myko account.
The Privacy Policy and Terms of Service are available on mykoapp.com and by opening the main menu in the Myko app:
From your phone, download the Myko mobile app from the Apple App Store or Google Play Store.
Yes. Follow these instructions:
If you are having trouble connecting to Myko and your product is powered-on and close by, the problem could be one of the following:
Myko products require access to a 2.4GHz network. Make sure your Myko product is within range of your Wi-Fi signal.
The Myko app will display only 2.4GHz Wi-Fi networks that your Myko product can detect.
If you do not see your Wi-Fi network listed, make sure your Wi-Fi router has a 2.4GHz network enabled.
To remove a product from your Myko account:
Yes, it is simple. Tell them to scan the product’s QR code, confirm they want the product transferred, and it will be added to their account and removed from yours.
Note: If you are already signed into your account, you will need to sign out to reach the Account sign in screen and the Forgot Password link.
If you do not receive the password reset email, check that you have entered the email address correctly and check your spam folder.
If you registered with an email address that you no longer have access to, or that is incorrect for some reason, you will need to create a new account and add devices to that account.
Yes. Myko allows multiple mobile devices to use the same account, allowing you to easily share access to your Myko products with people you trust. To share your account with your trusted friends and family, ask them to download the Myko app and then give them your Myko credentials.
Note - When sharing your account, you will give access to your administrative functions, set up and history
To delete your Myko account:
Note that this is permanent and cannot be undone. All data is deleted. If required, you can create a new account and add devices to it.
There is a Controls screen and a Settings screen for each of your products.
On the product’s controls screen you can set status on/off, colours, speeds, and use other controls specific to your product. From this screen, you can also open the product Settings screen, where you can make advanced settings and view information for your product.
To reach your product’s controls:
To open your product’s Settings screen:
Yes, go to a product’s Settings screen. At the top of the screen you will see your product’s name, with its icon just to the left. Press the PRODUCT NAME field to change the Product's name. Press the icon to change the product's icon.
No, Myko products do not work when connected to electrical circuits that have traditional dimmers on the same circuit.
Myko products require full wall voltage to operate and control the lighting brightness using controls in the app. A traditional dimmer switch dims conventional bulbs by lowering the mains voltage on the circuit, which will cause Myko products to lose power and drop offline.
Yes. Myko allows you to place your products in groups and control them together. The controls that are available will be determined by the products you place in the group. This means:
If you create a group that consists of products with similar controls, such as multicoloured lights, you will be able to operate a number of features from this group. For this specific case, you would be able to manage the power, brightness, white temperature, colour selection, and presets for the entire group of lights.
If you create a group that consists of products with different types of controls, such as a light, and a smart plug, you will be able to operate only the controls that are common to all products. In this specific case, you would be able to turn power on and off to the group as a whole, but that is all.
Note: Products that are placed in groups can still be operated individually.
To create a group, do the following:
Your new group will be listed on the Home screen. Press the Group name to open the common controls for the group.
If you would like to access an individual product in the group, press that product’s entry on the Home screen, or expand the group by pressing the little down ⌄ arrowhead, then select the product you want to control.
If you would like to add or remove products from the group, select the group from the Home screen to open the Group Controls screen. Press EDIT GROUP at the bottom of the screen.
From the Myko Home screen, open the main menu (upper-left on screen) and press ROOM MANAGEMENT. There you will see all your rooms, and how many products are in each room.
To edit or delete a room, press the menu icon ⋮ to the right of the room name to open your options: EDIT NAME or DELETE ROOM.
Press CREATE A NEW ROOM at the bottom of the screen if you need another room.
”Favourites” are products or groups of products that you want to access quickly. Your list of Favourites is especially handy if you have a lot of Myko products on your Home page.
Add a product or group of products to your Favourites screen by doing the following:
A Scenario captures the specific state of a product or a group of products, so you can return with one tap.
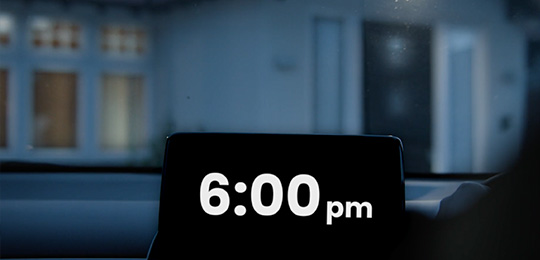
A Schedule enables the setting for a product or a group of products for a specific time.
An Automation enables a trigger to switch product or group of products to a specific state.
Here are some examples:
Learn more about how to use Myko.
We are always happy to help you with any queries. Please use the form below. By contacting us you will be agreeing to the terms and conditions of using this contact form.